Glove 80 - Per-Key Coloring

Introduction
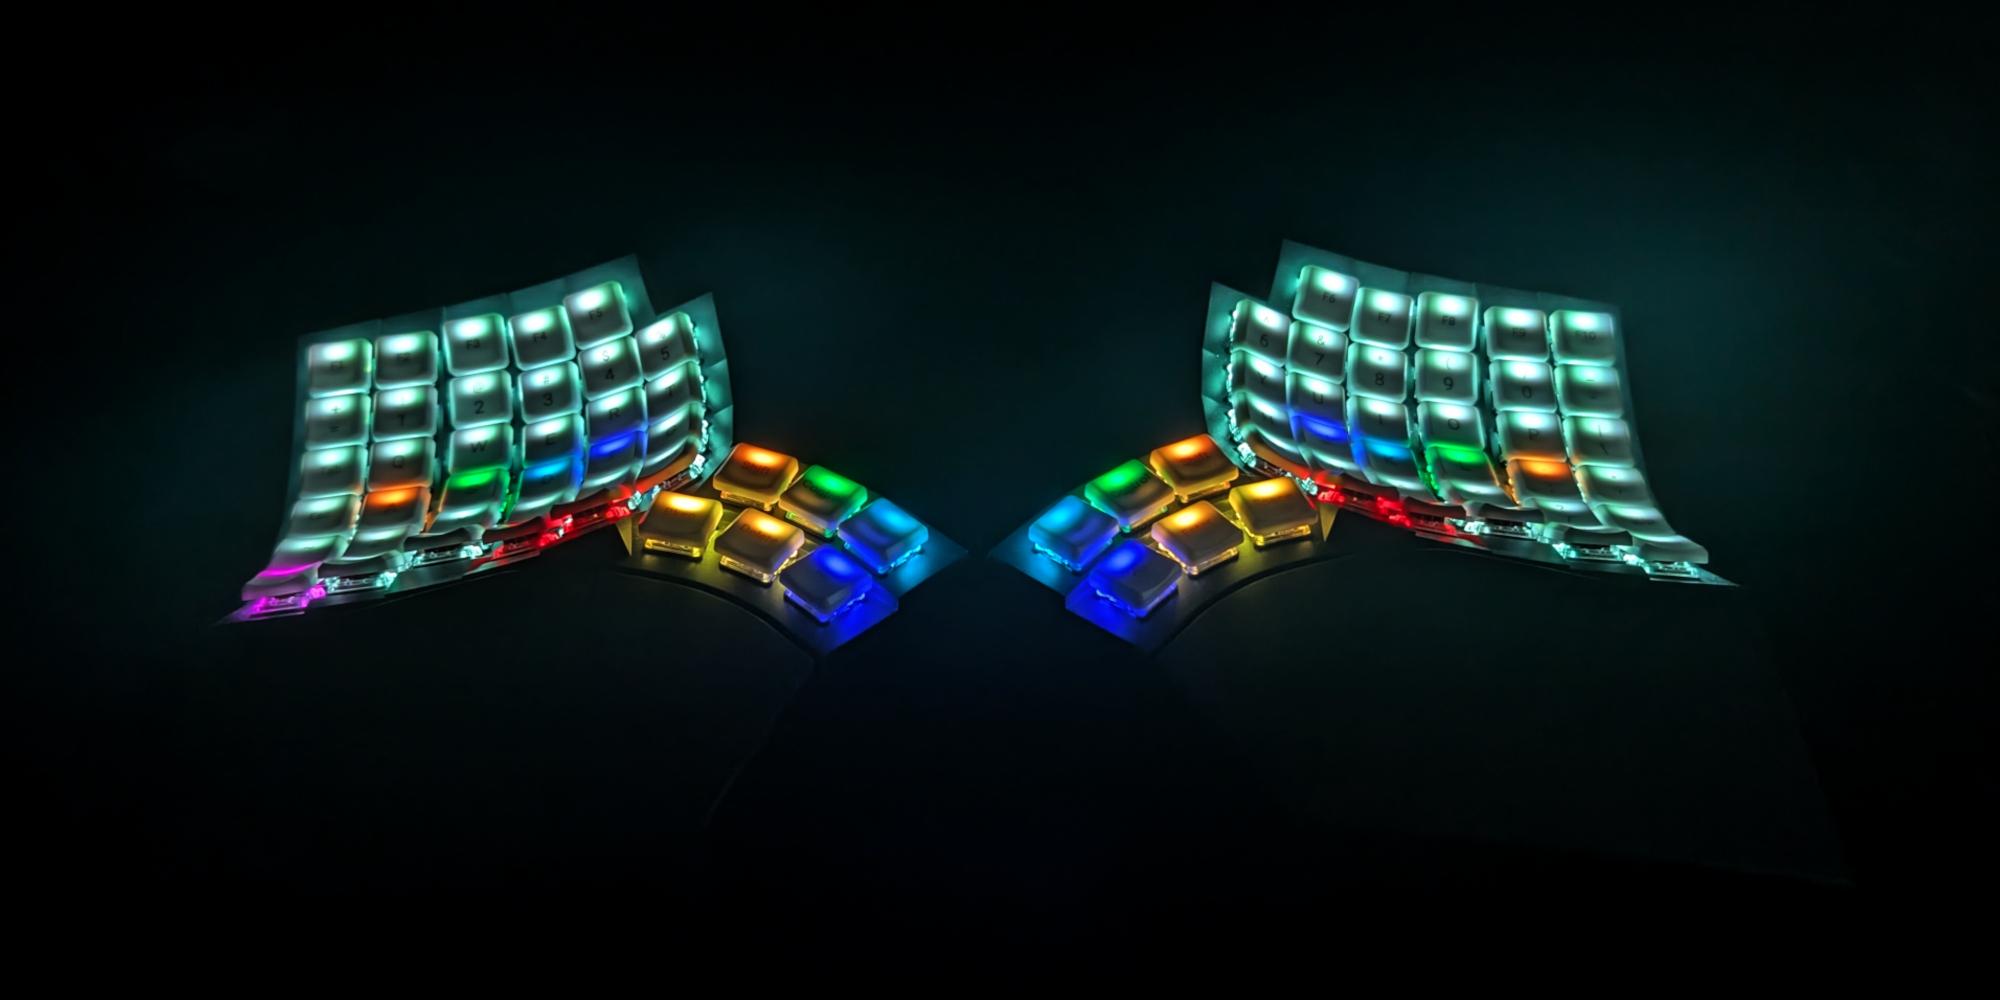
Glove 80 is a mechanical keyboard featuring per-key RGB lighting.
With the new Firmware community.pr36.per-key-rgb+20250106120812, you can now set individual key colors.
This guide will walk you though the process.
Warning
When upgrading from a previous firmware version, performing a factory reset is recommended. This will erase the non volatile configuration, including BLE profiles, RGB underflow preferences and other settings.
The Glove 80 Layout Editor
The Glove 80 Layout Editor is a web-based tool that allows you to customize the layout of your keyboard. You can access it at https://my.glove80.com/#/edit. An account is required, but registration is free and you can build your firmware directly on the website.
Once you are logged in you can create a new layout or modify an existing one.
Setting the colors
To configure per-key RGB lighting, add the following code under Custom Device Tree:
// ==== PER-KEY-RGB <section begins> ====
#include <dt-bindings/zmk/rgb_colors.h>
/ {
    underglow-layer {
        compatible  = "zmk,underglow-layer";
        mylayer {
            bindings = <
                &ug ___ &ug ___ &ug ___ &ug ___ &ug ___                                                                  &ug ___ &ug ___ &ug ___ &ug ___ &ug ___
                &ug ___ &ug ___ &ug ___ &ug ___ &ug ___ &ug ___                                                  &ug ___ &ug ___ &ug ___ &ug ___ &ug ___ &ug ___
                &ug ___ &ug ___ &ug ___ &ug ___ &ug ___ &ug ___                                                  &ug ___ &ug ___ &ug ___ &ug ___ &ug ___ &ug ___
                &ug ___ &ug ___ &ug ___ &ug ___ &ug ___ &ug ___                                                  &ug ___ &ug ___ &ug ___ &ug ___ &ug ___ &ug ___
                &ug ___ &ug ___ &ug ___ &ug ___ &ug ___ &ug ___ &ug ___ &ug ___ &ug ___  &ug ___ &ug ___ &ug ___ &ug ___ &ug ___ &ug ___ &ug ___ &ug ___ &ug ___
                &ug ___ &ug ___ &ug ___ &ug ___ &ug ___         &ug ___ &ug ___ &ug ___  &ug ___ &ug ___ &ug ___         &ug ___ &ug ___ &ug ___ &ug ___ &ug ___
                >;
            layer-id = <LAYER_Name>;
        };

        // Add more RGB layers here
    };
};
// ==== PER-KEY-RGB <section ends> =====
Modify layer-id = <LAYER_Name>; and mylayer { ... } to the desired layer name. The value of the layer-id parameter must match the associated keymap layer identifier. The automatically generated #define name can be used for this. The name of the RGB layer mylayer does not have any constraints other than it must be unique. It is recommended though to use the same name as the associated keymap layer.
To set key colors, replace ___ with a color. Colors are defined in rgb_colors.h and can be found here.
You can also use hex values like 0xFF0000 for red.
Example
Here you can find an example layout.
Flashing the Firmware
Once you are satisfied with your layout you can flash it to your keyboard. Important: You cannot revert to an old firmware after flashing.
- Ensure the firmware version in the Glove 80 Layout Editor's
Settingstab iscommunity.pr36.per-key-rgb+20250106120812. - Make sure
EXPERIMENTAL_RGB_LAYERis enabled in theAdvanced Configurationtab. - Click
Buildand download the.uf2file. - Enter bootloader mode
- The keyboard will appear as a USB drive. Copy the
.uf2file onto it and wait for the reboot.
If upgrading from a previous firmware, a factory reset is recommended. See the Glove80 documentation for instructions.
Enjoy you new layout!
Read Next
Daily Bugle TryHackMe Write-Up
The Daily Bugle room on TryHackMe is a hard room that requires you to compromise a Joomla CMS account.
How to create a next.js application with create-next-app
In this post we will explore how to create a next.js application using create next app.
How to create a next.js blog application with mdx and static generation
Explore how to create a next.js blog application with markdown support and static generation at build time.


